Did you feel that little hint of coolness in the air??? It's gotta be a sign of things to come, because according to the calendar, fall is on the way! I decorate for every season and I'm already looking forward to hauling out all of my fall stuff!! So.... I thought I'd get a bit of a jump on my fall decorating with this cute softball scarecrow!
I raided my husband's (I promised mention of his contribution in trade for the ball!) baseball duffle bag hunting for a softball suitable for making my scarecrow, and luckily this one fit the bill! A new softball would be preferable, but I was anxious to get started!
Needed supplies:
A softball, a piece of 8 1/2" by 11" cardboard, ruler, scissors, hot glue, tacky glue, 1/8th yard of fall print fabric, acrylic paint (antique white, green, black, and rose), paint brush, a permanent black magic marker, clear spray finish (I used Krylon), 2 large teardrop shaped "woodsies," a 6" straw hat, a cotton swab or sponge pouncer, a flat black button, raffia,a small sunflower, a needle and some embrodiery thread.
To begin we'll make the base for the softball "head" to sit on. This will hold the softball in place and make it easier to paint. cut a 1 x 11" piece of cardboard and a 2 1/2" by 12" piece of fabric. Center the cardboard onto the fabric and apply glue all around the edge of the fabric. Then fold it in to cover the cardboard.


After this dries, fold the strip end to end, overlapping about an inch, and hot glue these ends together forming a ring.

Place the softball on the ring so that the stitching resembles a big grin, and you're ready to paint the face.
You can see by looking at my scarecrow that the eyes are not identical. I drew them free hand. It's not important that they be perfect. Just make sure that each eye has 3 distinct sections.The largest section will be painted antique white, the next section green (I had to use three coats for complete coverage), the smallest section will be black. Once the eyese have completely dried, outline them with a permanent black magic marker, and add eyebrows. To highlight the eyes, dip a small round brush into white paint and make a small "comma" in the black of each eye.


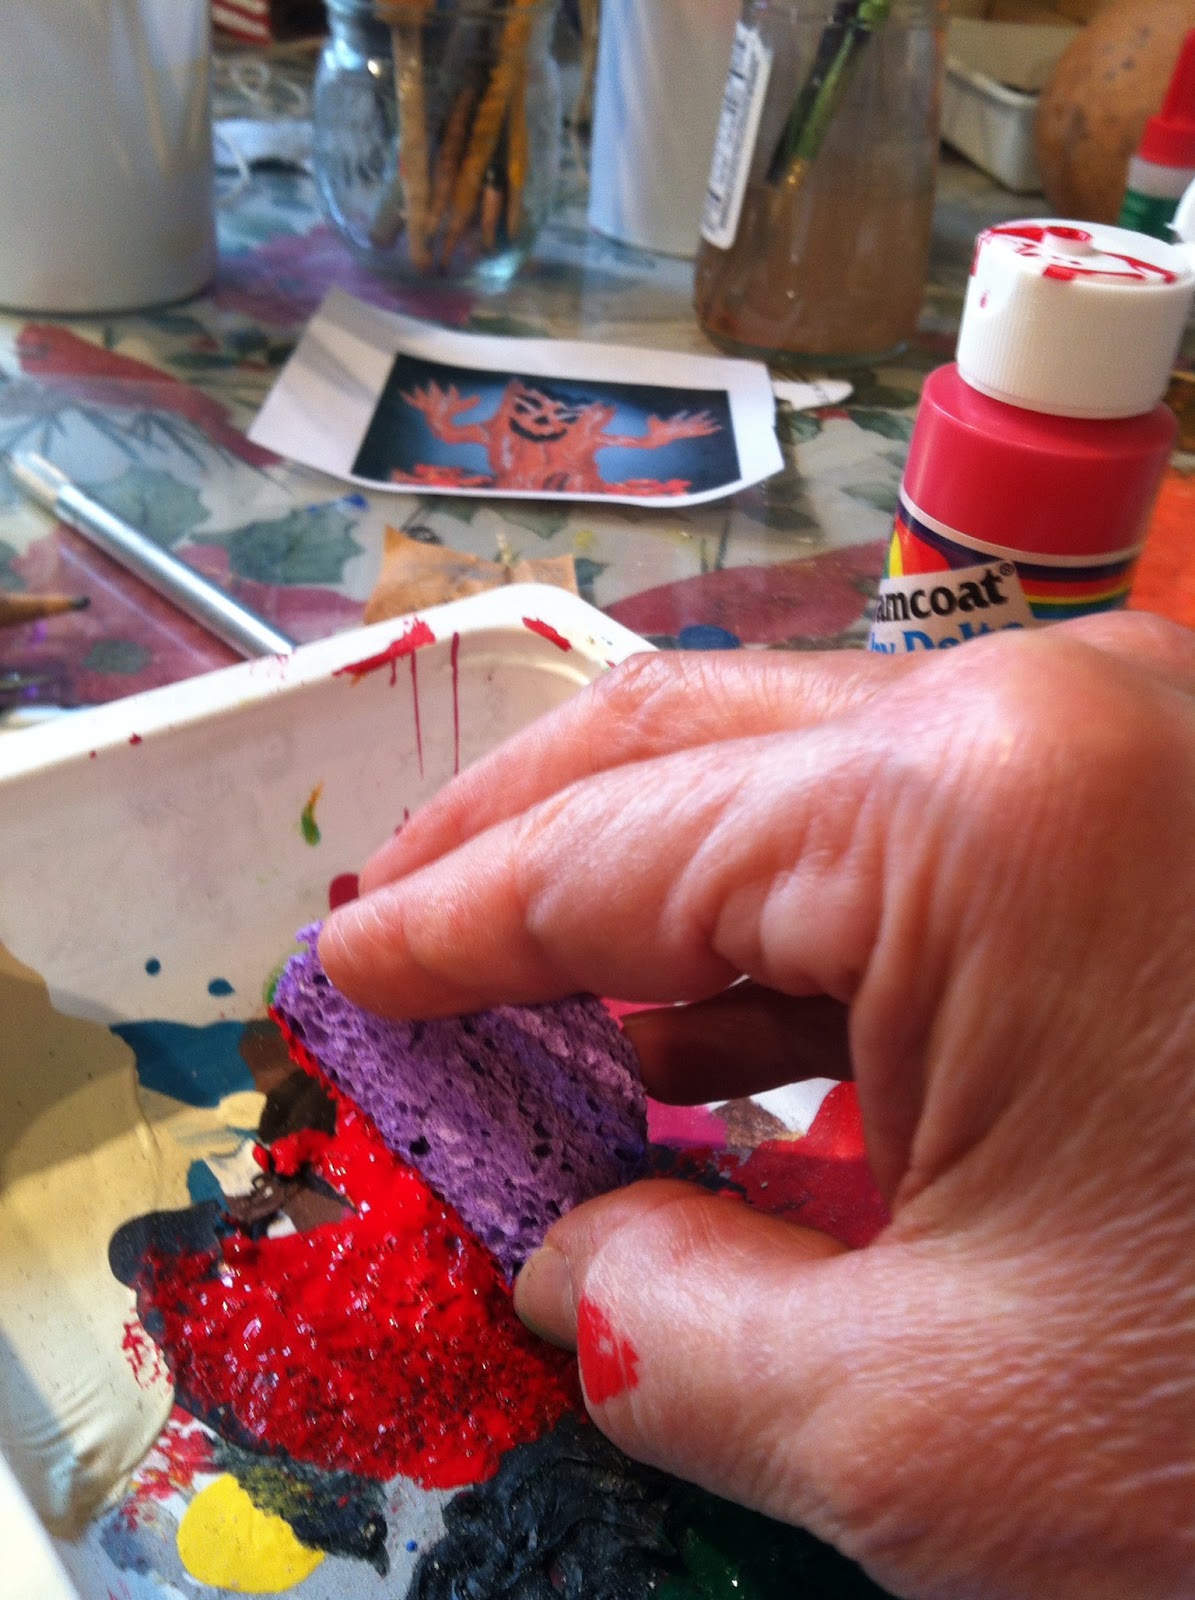
To paint the cheeks dip a Q-tip swab in water and then into the rose paint. Then make circular motions with the swab to form the cheeks. If they don't show up enough let the paint dry and then repeat the process. Once the cheeks have dried dip the round tip brush into the black paint to make the freckles. Spray the face with 2 coats of clear acrylic paint. Once it has dried glue on the black button nose.

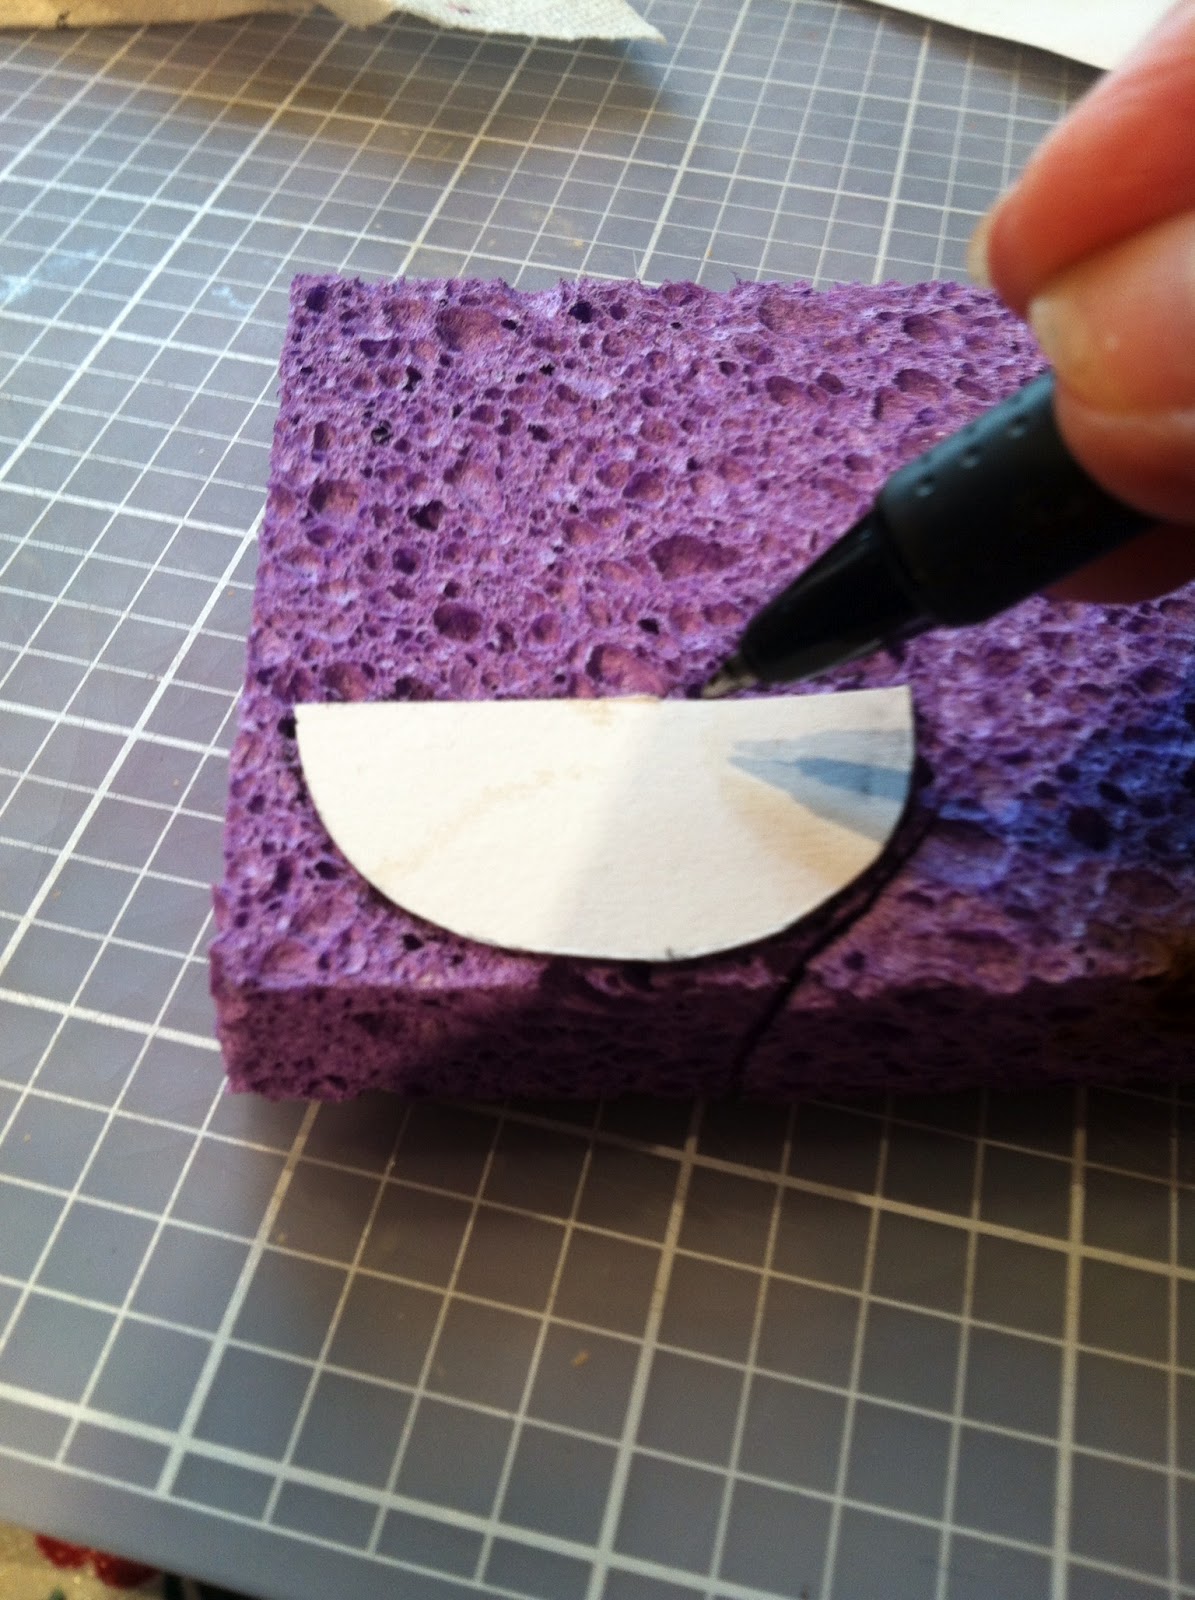
Crows: If you are unable to find the teardrop "Woodsies" create your own with heavy cardboard. Paint them as you see in the pictures below. They are very simple.


Now.....let's put this all together. Put tacky glue around the top of the ring you made in Step 1. Add the softball head on top. Let it dry thoroughly.
For the hair take a handful of raffia approximately 8-9" long and tie it in the center with a piece of string or embroidery floss. Glue the tied area to the top of the scarecrow's head. Spread the raffia around the entire head. Use the tacky glue on the side and back of the head to hold the "hair" down. You can use a rubberband if necessary to hold the hair in place while it dries. Trim the hair to the length you want.
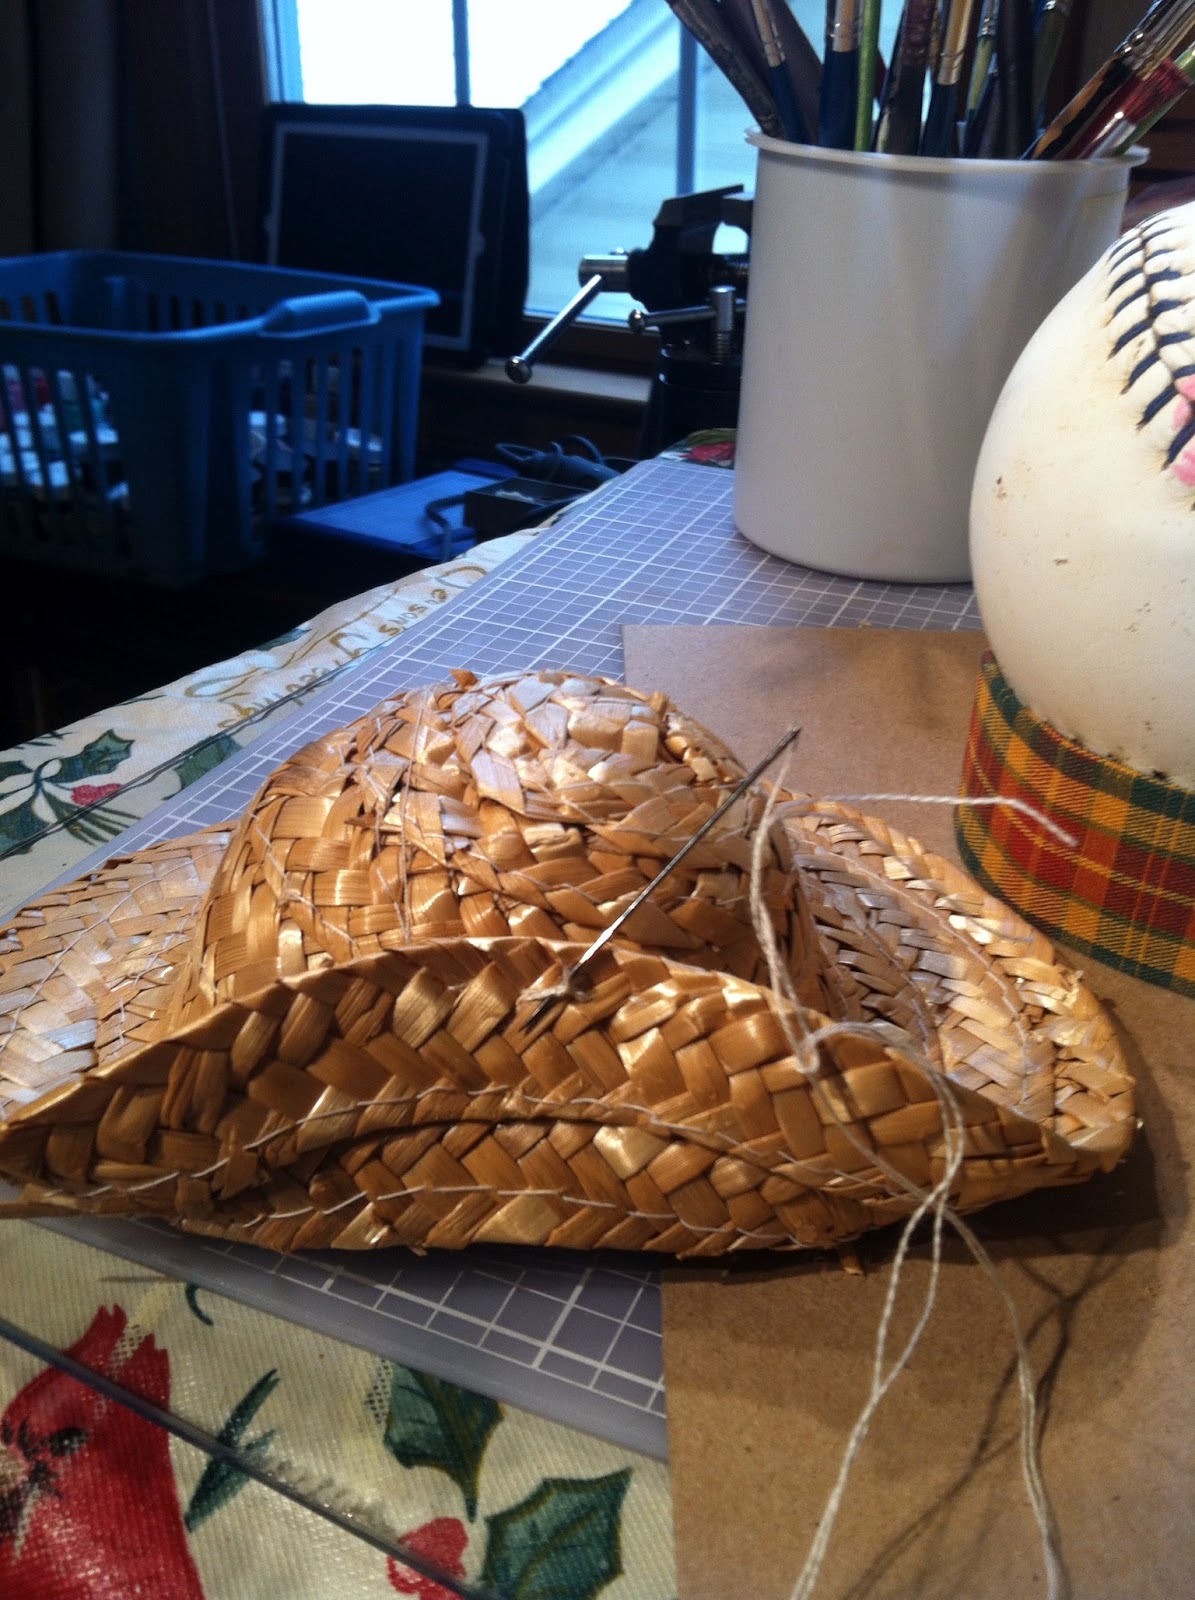
Hat: Use a 6" straw hat. Bend the brim of the hat back and secure it with embroidery floss. I used double thread and put three or four stitches to hold it in place. Glue fall leaves or sunflowers on the brim along with the crows. I used a hot glue gun to glue the hat onto the scarecrow's head, holding it in place until the glue set.
Using a 2" x 11" piece of fabric, tie a nice "bowtie" and glue it onto the front of the ring that you made in Step 1. Volia'! There you have it! For a pair of cute scarecrows, make an additional little guy using a baseball! As always...if you have any questions....give me a shout! Happy crafting!